[wpupg-grid id=”test”]
Cornell BBQ Chicken

Cornell BBQ Chicken
Ingredients
- 1 4 lb Frying Chicken
- 1 c oil
- 1 c vinegar
- 2 tbsp salt
- 2 tbsp flour
- 2 tbsp poultry seasoning
- 1 tsp pepper
- 2 eggs
- 1/2 cup Beer
Instructions
-
Cut chicken into pieces.
-
Beat egg with oil.
-
Add vinegar, beer and seasonings and blend together.
-
Divide in half and pour one half over chicken and marinate for at least 2 hours, or up to overnight.
-
Whisk the flour into the remaining sauce and use to baste the chicken while grilling. Discard the sauce that was used as a marinade.
-
For gas grills, set to medium heat, for Charcoal, lower the bed of coals to approximately 3" away from cooking area.
-
Place chicken on grill so that the pieces are touching and close the lid.
-
Turn and reposition chicken every 7 minutes, brush with marinade before and after turning. Close the lid again after turning.
-
Total grilling time will be a minimum of 1 hour but can take up to 1 1/2 hours.
-
Use care when grilling as the oil increases the flare-ups. A water spray can extinguish any flare-ups.
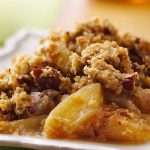
Valerie’s Apple Crisp
Delicious and easy! Apple Crisp is a desert that is the perfect ending to any family get-together. This version is from my sister-in-law who lives in Portland, OR.
Granny Smith apples are usually used for baking due to their ability to hold up under baking and have a good balance of sweet-tart. However, other apples you can try are Jonagold or Honeycrisp.
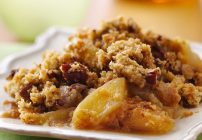
Valerie's Apple Crisp
Ingredients
- 8-10 medium Apples Granny Smith are best
- 1 1/2 C Sugar
- 2 Tbsp Water
- 1 C sifted All Purpose Flour
- 1/2 Tsp Cinnamon
- 1/8 Tsp Salt
- 1/2 C Butter at room temperature
Instructions
-
Peel, core and slice the apples.
-
Place apple slices in 12" x 9" casserole and add 1 C of Sugar. Add water and stir to combine.
-
Combine Flour, 1/2 C Sugar, Cinnamon and Salt together in mixing bowl.
-
Cut in butter until well incorporated.
-
Sprinkle mixture over Apples.
-
Bake at 350 degrees for 50 minutes.
Carne Asada

Carne Asada
Ingredients
- 3-4 lbs flap meat steak
- 1/4 C Orange Juice
- 1/4 C Lime Juice
- 1/4 C Vegetable Oil
- 1/4 C Malt Vinegar
- 1/4 C Chopped Cilantro
- 1/4 C Chopped Green Onion
- 1 Chopped Jalapeno seeds removed
- 1 Tbsp Chili Powder
- 1/2 Tbsp Cumin
Instructions
-
Whisk together marinade ingredients until well blended
-
Place meat in large plastic zip-lock bag
-
Pour Marinade in bag
-
Place bag in refrigerator for 3-4 hours or overnight, agitating bag several times
-
Grill over coals or gas until medium. Do not overcook.
-
Thinly slice against the grain
Oatmeal Chocolate Chip Cookies

Oatmeal Chocolate Chip Cookies
Ingredients
- 1 cup butter softened
- 1 cup packed light brown sugar
- 1/2 cup white sugar
- 2 eggs
- 2 teaspoons vanilla extract
- 1 1/4 cups all-purpose flour
- 1/2 teaspoon baking soda
- 1 teaspoon salt
- 3 cups quick-cooking oats
- 1 cup semisweet chocolate chips
Instructions
-
Preheat oven to 325f.
-
In a large bowl, cream together the butter, brown sugar, and white sugar until smooth. Beat in eggs one at a time, then stir in vanilla. Combine the flour, baking soda, and salt; stir into the creamed mixture until just blended. Mix in the quick oats, and chocolate chips. Drop by heaping spoonfuls onto ungreased baking sheets.
-
Bake for 12 minutes in the preheated oven. Allow cookies to cool on baking sheet for 5 minutes before transferring to a wire rack to cool completely.
ET Egg Art
I don’t get many opportunities to use farm-fresh eggs. But if I did, I probably wouldn’t get the very interesting shapes that come from the less-than-fresh, mega grocery product.
A fresh egg will hold together much better than one that has been in the fridge for awhile, but it’s the not-so-fresh eggs that have been providing these very interesting shapes after they’ve been added to the frying pan.
Next time you fry up some eggs, take a good look to see if something is trying to tell you something.
Retirement’s Been Rather Busy
 A couple weeks ago, in my lifestories website, I said that after two weeks into retirement I was enjoying the new life. But I never detailed exactly what I was doing.
 One of the best things about my chosen activities, is they all seem to blend together at some level. I have been involved with PCs and related technology from the mid-1970s. And 20 years ago, I started learning about and creating websites. But for a much longer period of time, I have been cooking – so I think that you can see where this is going…
SteveDoesFood.com is a site that I created about 5 years ago under the name “Sturdy Chef”, but recently I decided that I didn’t like that name, so I moved it all over to the new domain.
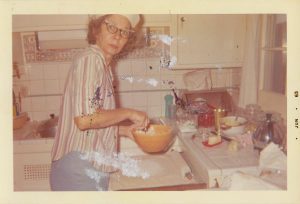
I originally just wanted to have a place to collect and display all of my family’s old recipes, but it soon took on new purposes, and I have been adding recipes that Colleen and I have created (or modified to our liking).
As I mentioned, I’ve been cooking since childhood. I remember watching my dad cooking fried eggs and bacon, and the desire to be like him must have started me going. When I was growing up, food was equated with fun, and we frequently got on the city bus and rode downtown to gramma’s where we always had some kind of feast. I learned about pies, biscuits, gravy and lots of other comfort food from the best. Then when I was 14, I got a summer job at the Colorado Lagoon concession stand and I spent the next 5 summers cooking and serving Hamburgers and Hot Dogs – it was elegant cuisine!

I am definitely not a food or cooking expert, but by nature I am very curious, and learning and discovering the way it all works is important to me. I was surprised later in life to discover that many people were not cooks in the sense that although they could open a box or package and follow the instructions, they wouldn’t be able to go outside those boundaries. I’m not like that at all – I’m all for starting from scratch and seeing what happens. Sometimes it works out, and sometimes not. But I think that throughout the years, you get a feeling for what works and what doesn’t.
SteveDoesFood.com is a hobby that combines the 4 things that I enjoy the most; family, cooking, technology and writing. By linking these posts to Facebook, I’m hoping to make a connection and give us all a few more things to talk about and give us a break from all the other crap that is going on.
Thanks for indulging me!

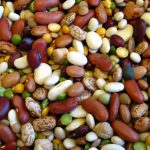
How to cook dried beans
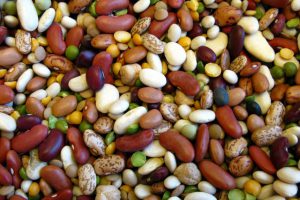
Versatile, quick, easy, healthy. What else can you ask? Canned beans may be quicker and easier, but you’re stuck with poor texture and whatever else they put in the can along with the beans. Here are two methods to cook dried beans.
Pre-Soak Method:
Sort beans to eliminate any non-bean items (pebbles, debris, etc).
Place beans into a pot that is large enough for beans to expand. Add 3 times as much cold water to the beans and allow to soak overnight (minimum of 8 hrs). The beans will have increased in bulk by two to three times. Rinse the beans under cold water several times until water runs clear. Do not add salt at this point.
Bring beans to a boil and cook for the minimum amount of time listed below. At the end of the suggested time, test them for tenderness. If not quite done, continue cooking for up to 30 minutes. Beans are done when you can easily squish them between your thumb and forefinger.
At this point, you can add salt and other seasonings and continue with your recipe.
Black Beans – 50-60 minutes
Butter Beans – 60-90 minutes
Cannellini Beans – 60-90 minutes
Chestnut Beans – 60-90 minutes
Fava Beans – 50-60 minutes
Flageolet Beans – 60-90 minutes
Garbanzo Beans – 60-90 minutes
Great Northern Beans – 50-60 minutes
Kidney Beans – 60-90 minutes
Lima Beans – 40-45 minutes
Mung Beans – 40-45 minutes
Navy Beans – 50-60 minutes
Pea Beans – 50-60 minutes
Pinto Beans – 50-60 minutes
Red Beans, small – 50-60 minutes
Soybeans – 2 1/4 hours
Quick Soak Method:
Sort the beans per instructions above.
Place beans into a pot that is large enough for beans to expand. Add 3 times as much cold water to the beans and bring to a boil. Boil for 5 minutes. Remove from heat and allow to stand for 1 1/2 hours.
Bring beans back to a boil and cook for the minimum amount of time listed above. At the end of the suggested time, test them for tenderness. If not quite done, continue cooking for up to 30 minutes. Beans are done when you can easily squish them between your thumb and forefinger.
At this point, you can add salt and other seasonings and continue with your recipe.
For Peas, Lentils and Black-eyed peas:
There is no need to pre-soak dried peas, split-peas, black-eyed peas, or any variety of lentil.
Sort beans per instructions above.
Place beans in a part that is large enough for up to 2 times expansion. Add cold water. Bring to a boil and cook for the amount of time listed below. Add salt and other seasonings during the last 15-20 minutes of cooking.
Black-eyed Peas – 30-40 minutes
Lentils, green or brown – 25-30 minutes
Lentils, red – 10 minutes
Lentils, French or black – 20 minutes
Peas, split – 50-60 minutes
Peas, whole – 60-90 minutes
Tips:
- If your water is hard, use bottled water to soak and cook beans. Hard water sometimes results in tough skins.
- Cook beans at a simmer, do not allow beans to come to a rolling boil as this will increase the chance of beans splitting their skin and becoming mushy.
- After adding water, discard any beans that float to the top.
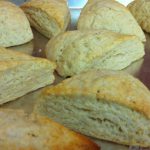
Simple Scones
From an American context, the simple difference between scones and biscuits are that scones are sweet, and biscuits are not. Scones are really just a variation on a biscuit, but they are different enough so that I consider them to be separate entities. I was brought up with biscuits to be eaten with eggs and gravy and that they should be round, light and flaky, whereas scones should be eaten with your morning coffee with a little jam or clotted cream, and their form and texture tends to be more lumpy.

Simple Scones
Ingredients
- 2 1/2 cups all-purpose flour
- 1 tablespoon baking powder
- 1/4 teaspoon salt
- 1/4 cup granulated sugar use 1/3 for slightly sweeter scones
- 8 tablespoons cold unsalted butter cut up
- 2/3 cup milk
for brushing on top:
- 1 tablespoon milk
- 1 tablespoon superfine sugar
Instructions
-
Put flour, baking powder, sugar and salt into a large bowl and mix well
-
Add butter and cut in with a pastry blender or rub in with your fingers
-
Add milk and stir until dough starts to form.
-
Place dough onto floured board and knead a couple of times to bring together.
-
Divide dough into two equal size balls and turn smooth side up.
-
Pat each doughball into a circle approx 3/4" to 1" thick
-
Brush each circle with milk and dust with superfine sugar.
-
Cut each circle into 6 or 8 wedges.
-
Place wedges on a cookie sheet sprayed lightly with a non-flavored no-stick spray, spacing about 1 1/2 inches apart.
-
Bake about 12 minutes in a 425 degree oven until light to medium brown on top.
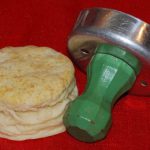
Baking Powder Biscuits
People are passionate about their biscuits!
Seriously, it’s easy to get into a heated debate about which type of flour, shortening or method produces the best biscuit. But this recipe was good enough for my grandma, so it’s good enough for me. Plus, I always have everything right on hand, so I’m never more than 20 minutes away from fresh, flaky biscuits!
The keys to great biscuits are:
- Fresh ingredients. Especially make sure that the baking powder still has a punch. If you haven’t used it in a while, test if by putting a teaspoon or so of hot tap water into a glass and sprinkling a little of the powder on top. If it bubbles up, it’s still good.
- Don’t overwork the dough. Just 3 or 4 stirs after adding the milk to make sure it’s mixed and then dump it out on a floured board to finish it up.
- Use a sharp cutter, and don’t twist it when cutting! A dull cutter, like a water glass, presses the edges of the dough together so that the biscuits don’t get a chance to rise. Likewise, when you twist the cutter, the cut edge is less likely to rise as much.
- Bake the biscuits towards the top of the oven. The heat from most home ovens comes from the bottom, and if the biscuits are too close to the heat source, the bottoms cook too quick and become dense and non-flaky.
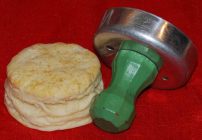
Baking Powder Biscuits
Ingredients
- 2 cups all purpose flour the fresher, the better
- 1 tablespoon baking powder once again, fresh
- ½ teaspoon salt
- 1/4 teaspoon sugar optional - helps to eliminate the chemical taste of baking powders that contain Aluminum compounds
- 4 tablespoons cold Butter Crisco or Lard will work also - see notes
- ⅔ cup milk
Instructions
-
Preheat oven to 425F.
-
Mix the dry ingredients
-
Cut the butter into small pieces and add to the dry ingredients
-
Cut in the butter with your fingertips or a pastry cutter
-
Stir in the milk until just blended. Don’t work the mixture too much, the dough should be very moist.
-
Sprinkle some flour on a dry board and dump out the dough
-
Pat the dough gently out until it is about 12″ round
-
Fold in half and pat out until it is a uniform, 1/2" to 3/4” thick
-
Use a biscuit cutter and press straight down into the dough (don’t twist as that action can seal the edges)
-
Place on cookie sheet spacing about 1/2" apart.
-
Bake on the top rack of the oven for 10 to 12 minutes, until lightly browned on top.
Recipe Notes
Shortening - I prefer butter for no better reason than I always have it on hand. Some people find that lard imparts an undesirable flavor, but gives a more flaky biscuit. Crisco works fine but without the rich flavor of the butter.
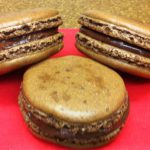
Chocolate Macarons – Demystified
I’ve heard many horror stories about trying to make macarons. I really think that they are just stories.
When I made up my mind that I was going to try to make them, I had already read all about how important it was to age the egg whites and to let the freshly piped halves set for 30 minutes before baking, etc. But, after my successful, albeit bumbling, first attempt, I found them to be no more difficult than any other pastry recipe.
Sure, there are things that you have to be careful about, but if you plan ahead and take your time, you’ll find that making these is actually quite fun, and the end result will have everyone oohing and ahhing about how wonderful a cook you are to be able to make the fabled macaron!
Here are some basic Macaron keys to success:
- Almond Flour
Doesn’t have to be almond at all! The classic method is with almond flour, and since almond flour is readily available, it makes sense to use it. As long as you sift whatever you use, it should be OK.
- Meringue development
Cream of Tartar might help the development and stabilization of the meringue, but you don’t have to use it. You can simply beat egg whites and sugar together to make a very nice meringue, and since you are collapsing the meringue anyway… Make sure that the meringue is whipped to the “Firm Peak” stage. That’s all!
- Mixing the Batter
When combining the meringue with the dry ingredients, fold and stir gently, not vigorously, until no traces of meringue remain. The batter should not be runny, but should have a plastic quality similar to molten lava.
- Oven temp v.s. time
Macarons can be baked at temps from 280°F to 350°F . Lower temps require longer cooking. 17 minutes at 280°F and 14 minutes for 350°F. Most home use ovens have hot spots, so halfway through the baking time, rotate the pans to lessen the impact of your oven’s hot spots.
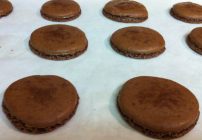
Chocolate Macarons
Ingredients
For the shells:
- 2 cups powdered sugar sifted
- 1 cup almond flour sifted
- 3 tablespoons cocoa powder
- 1/4 teaspoon fine salt
- 3 large egg whites at room temperature
- Pinch cream of tartar
- 3 tablespoons superfine sugar
For the ganache filling:
- 4 ounces bitter or semi sweet chocolate finely chopped
- 1/2 cup heavy cream
- 2 tablespoons unsalted butter at room temperature and cut into cubes
Instructions
For the shells:
-
Line two baking sheets with parchment paper; set aside. Fit a large pastry bag with a 1/4-inch plain tip; set aside.
-
Sift the almond flour, powdered sugar, cocoa powder and salt together into a large bowl
-
Stir dry ingredients to ensure they are well mixed.
-
Place the egg whites in the bowl of a stand mixer
-
With a whisk attachment, beat on medium speed until opaque and foamy, about 30 seconds.
-
Add the cream of tartar, increase the speed to medium high, and beat until the egg whites are white in color and hold soft peaks, about 1 minute.
-
Continue to beat, slowly adding the granulated sugar, until the sugar is combined, the peaks are stiff, and the whites are shiny, about 1 minute more. (Do not overwhip.)
-
Transfer the meringue to a large bowl.
-
Using a rubber spatula, fold the dry mixture into the egg whites in several batches until the dry ingredients are just combined. (The meringue will deflate.)
-
Stop stirring when there are no traces of egg whites, the mixture will resemble slow-moving lava (do not overmix)
-
Transfer the batter to the pastry bag.
-
Pipe out 1-1/4-inch rounds about 1 inch apart onto the baking sheets, about 20 per sheet.
-
Pick up the baking sheets and bang them gently against the work surface to settle the mixture.
-
Let the rounds sit at room temperature for 30 minutes to dry the tops and ensure even cooking.
-
Heat the oven to 350°F and arrange a rack in the middle.
-
Bake the macarons one sheet at a time for 7 minutes. Rotate the sheet and cook for 7 minutes more.
-
Transfer the sheet to a rack to cool completely.
For the ganache filling:
-
Place the chopped chocolate in a large bowl.
-
Warm the cream in a small saucepan over medium heat until it just starts to boil. Stir it into the chocolate and let sit for 1 minute.
-
Add the butter and stir until smooth.
-
Chill in the refrigerator until thickened but still spreadable, at least 30 minutes.
To assemble:
-
Pair macarons of similar size.
-
Place about 1 teaspoon Ganache onto the center of a macaron half.
-
Top with another half and press gently so that it looks like a mini hamburger. The filling should not ooze out the edges.
-
Refrigerate, covered, at least 24 hours before serving.
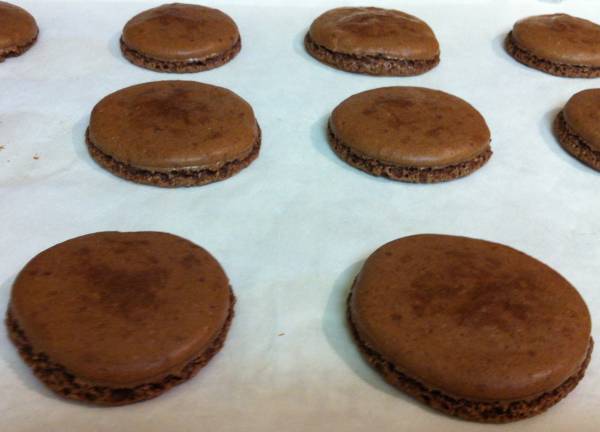
Fresh out of the oven, let them cool completely before taking them off the sheet.
Fudge – Basic

With the holidays almost here, it’s time to break out all the candy making utensils – heavy bottom pan, thermometer, wooden spoon, etc. Chocolate fudge has always been part of the holidays – everyone looks for this dark, sweet, and in this case, velvety smooth confection.
Although this recipe requires some special care, it is pretty basic from a candy-making standpoint. Fudge is a crystalline candy, meaning that it is comprised of tiny micro crystals which give it its firm but smooth texture. Great fudge is made by getting these crystals to form at just the right time.
Keys to good fudge:
- Stop stirring after the syrup begins to boil
stirring at this stage increases the likelihood that sugar crystals will form
- Wash down the sides of the pan while it is boiling
It is important to remove any sugar crystals as even one crystal can “seed” the mixture and encourage others to form.
- Allow the fudge to cool undisturbed until temperature reaches 110 degrees
Further stirring during this period will increase sugar crystal formation
- After the fudge cools to 110 degrees, stir continuously until it “sets up”
At this stage, crystallization is still possible, but stirring helps control the size of the sugar crystals that form
Rosemary Potato Salad
Our mother’s recipe stash had at least a dozen different recipes for Potato Salad. The one that I am most fond of is mayonnaise based and is really pretty plain, but it does conjure up memories of summer picnics and family outings. This one, however, is more perky and flavorful. Try it with your next barbecue.

Rosemary Potato Salad
Ingredients
- 5-6 White or Red Potatoes
- 2 green onions chopped
- 3 tablespoons olive oil
- 2 tablespoons red wine vinegar
- 1 tablespoon lemon juice
- 1 tablespoon mayo
- 2 tablespoons fresh Rosemary finely chopped
- 1 teaspoon dried thyme
- salt to taste
- pepper to taste
Instructions
-
Rinse and dice potatoes (1" to 1 1/2" cubes)
-
Boil potatoes until tender - about 10 -15 minutes
-
Combine green onions with olive oil, vinegar, lemon juice, mayo, and spices.
-
Drain and rinse potatoes.
-
Gently toss potatoes with other mixed ingredients
Broccoli Cheddar Soup
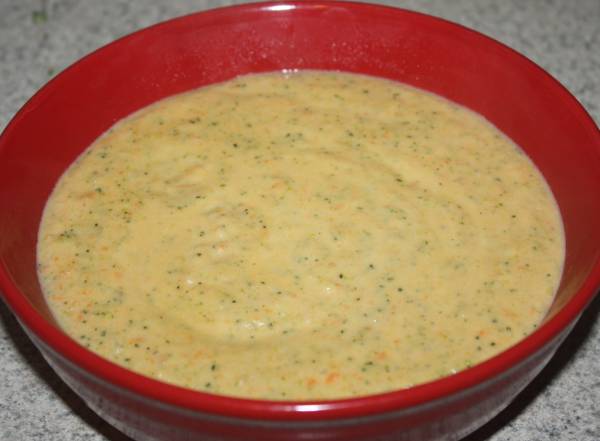
Just in time for Winter! This is another family favorite from my mother’s box.
It’s really fairly easy if you want to skip the blending step to de-chunk it. I like it just the same with a few broccoli chunks as long as they aren’t too big.
Broccoli Cheddar Soup
Ingredients
- 1/4 cup butter
- 1 onion finely diced
- 4 to es garlic sliced thin
- 2 Cups Broccoli florets finely chopped
- 1 quart chicken broth
- 1/4 cup all-purpose flour
- 1 cup milk skim or non-fat is OK
- salt and white pepper to taste
- 8 ounces shredded sharp Cheddar cheese
Instructions
-
Melt butter over medium heat in large saucepan
-
Add onion and garlic and cook for 5 minutes - don't let the garlic brown.
-
Stir in broccoli and chicken broth.
-
If you desire less chunks, remove 1/2 of the soup to a blender and process for 10-15 seconds. If you want a chunkless soup, process all of the soup.
-
Return soup to the saucepan and bring to a boil and simmer until broccoli is tender, 10 to 15 minutes.
-
Meanwhile whisk flour into milk until dissolved.
-
Stir into soup stirring frequently until thickened.
-
Reduce heat, and stir in cheese until melted and heated through.
-
Season with salt and white pepper to taste.
Potatoes with Green Beans and Garlic
Simple and elegant, this goes well with just about any main dish. My brother and his wife live in Sequim, Washington and they maintain a large garden that provides the ingredients for this dish. My sister-in-law Elaine makes this for me every time I pay them a visit.
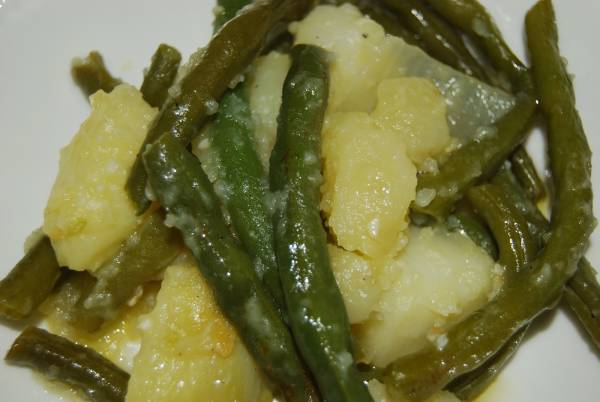
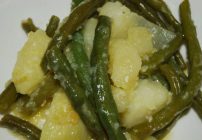
Potatoes with Green Beans and Garlic
Ingredients
- 5 Med White or Red Potatoes
- 1 1/2 lb fresh Green Beans
- 4 Medium Toes Garlic
- 1 Tbsp Extra Virgin Olive Oil to saute garlic
- 1/4 C Extra Virgin Olive Oil
- Kosher Salt
Instructions
-
Cut potatoes into 1" to 1 1/2" cubes and boil in lightly salted water until tender (15-20 minutes).
-
Snip ends off of Green Beans and boil until tender (minimum of 20 minutes but may take longer due to toughness).
-
While potatoes and beans are boiling, slice the garlic into thin slices.
-
Saute the garlic in 1 tbsb Olive Oil until soft, but no longer than 5 minutes.
-
When potatoes and beans are both done and still very hot, drain well and place Potatoes into a large serving bowl.
-
Place the garlic slices on top of the Potatoes and then add the Green Beans.
-
Pour on Olive Oil, add salt to taste and toss well.
-
Serve with a sprinkling of vinegar or a little aioli.

